Labels

Saturday, September 7, 2013

Juggling Pickles

So the season has been odd this year... cold then wet, moderate temps then heat wave (nothing in between), then a cool spell and now back to heat.  It took a long time for the cucumbers to set on, but now they have and wow are there a bunch! This is when being an organized canner comes in handy.

You see, a few years ago I had over 100 pounds of cucumbers for the year...I stopped counting at 100.  I had so many pickles canned that I gave whole batches away, a couple dozen jars more to a bake sale/benefit for a friend, and still had two years worth on the shelf for us.  Last year I didn't even get any, and I still have "old" pickles on the shelf before adding this year's.  They are still good to eat, by the way, as long as they are sealed, but watch out -- two year old pickles can really knock your socks off!

I loved having enough to share and gift, but I was canning pickles almost daily!  I thought, there has got to be a better way! Time to get organized! YES, I am kind of a geek for efficient processes -- it seems crazy to do essentially the same thing daily when I can do it all at once! You know that lady in Proverbs... the one who makes good use of her time, wakes early, and provides food for her household -- whose family rises and calls her blessed? Yeah... I'll never be her. Still, I think we sure can do what we can within our own spheres and lifestyles to lean that direction! We might just grow a wee bit in the process!

So...I have finally figured out a system that helps me can all my pickles for the week/two weeks at once, leaving more time for family and canning/preserving other goodies, too! A little forethought can go a long way to making this a manageable process rather than a juggling act!

  1. Sort and Store:  I like to make relishes, slices, and spears/whole dills.  So I sort them that way.  The green produce zipper bags keep them up to two weeks fresh in the back of the fridge.  I label each by use so I don't have to keep measuring: (6" or less = spears/wholes, longer than 6" but slender enough for my food processor's slicer attachment = hamburger dills, overgrown = relishes). When my fridge is full I start weighing and have a canning day!  On to the trusty Ball Blue Book (if it's not broke don't fix it... get your recipe from the experts here). The BBB has the following weights for each batch: 4# for sliced pickles, 8# for relish, 8# for dills.
  2. Get the kitchen to yourself: If you can't do this, finding a way to occupy the family works... but having another adult to care for any little ones really helps! Start to finish this was a 4 hour process for me, after being practiced enough to know what I am doing.  Learning, it will take you a little longer until you get your canning "wings," so to speak.
  3. Setup your workstations: For me it is like a pivoting dance, all within a 10 sq. foot area in my L-shaped kitchen (see previous post):
    • Sink
    • Workspace
    • Processor (and holding bowls)
    • Packing
    • Canner/Stove
    • Cooling
    • Cleaning
  4. Process in order: Think ahead to the time frames and order your batches so you can just keep working until you are done. 
    • I start with relishes - a great way to use up those cukes that got too big! Dill is my favorite but the sweet recipe in the BBB is good too.  Food processor with chop-blade makes short work of it (as well as the onions later). Here's a visual:
    Rough chop


    process into fine chop
    Season and sit (2hrs),
    covered for cleanliness.


    • Then move on to the spears/wholes. For these you just need to bring the vinegar/salt/pickling spices to a boil, simmering for 15 minutes and cut the cucumbers to size. This is the time to bring the canner up to a boil too (remember that can take up to 30 minutes sometimes!) If they are good spear size but a little long you can just cut a bit of length off so you have head space.  Pack into hot sterile jars with dill and peppercorns. Ladle vinegar over the jars and seal with two-piece caps. Process in BWB (Boiling Water Bath) for the time in the BBB recipe.
      • A word of advise: I LOVE the Kosher dill variation in the BBB.  This calls for additional seasonings, cloves of garlic and a whole cayenne pepper ...very worth it for the flavor and they look gorgeous when done!
    • Next is slices While the spears are processing in the canner, you can start slicing the "Hamburger Dills" in the food processor with the slicer blade (I have tried lots of slicing methods and this is the perfect thickness and much quicker than doing it by hand) -- dump them in a bowl to be ready. Pack in jars, season per recipe, and heat vinegar just like the last batch.
      Slicing...

      
      Packing ... add vinegar and seal.
    • Back to the Relishes: Once the spears are done and the slices are processing in the canner, you can go back and finish the relish steps. Then ladle into hot sterile jars and do that canning thing you have down-pat by now. By the time the relish is in jars, the last batch should be done. Into the BWB they go! See what I mean? The steps become easier the more you repeat them!
      Rinse, drain, and add to stock pot
       
    •  
      Chop (FP) onions/peppers. Add to pot with seasoning, vinegar.
       
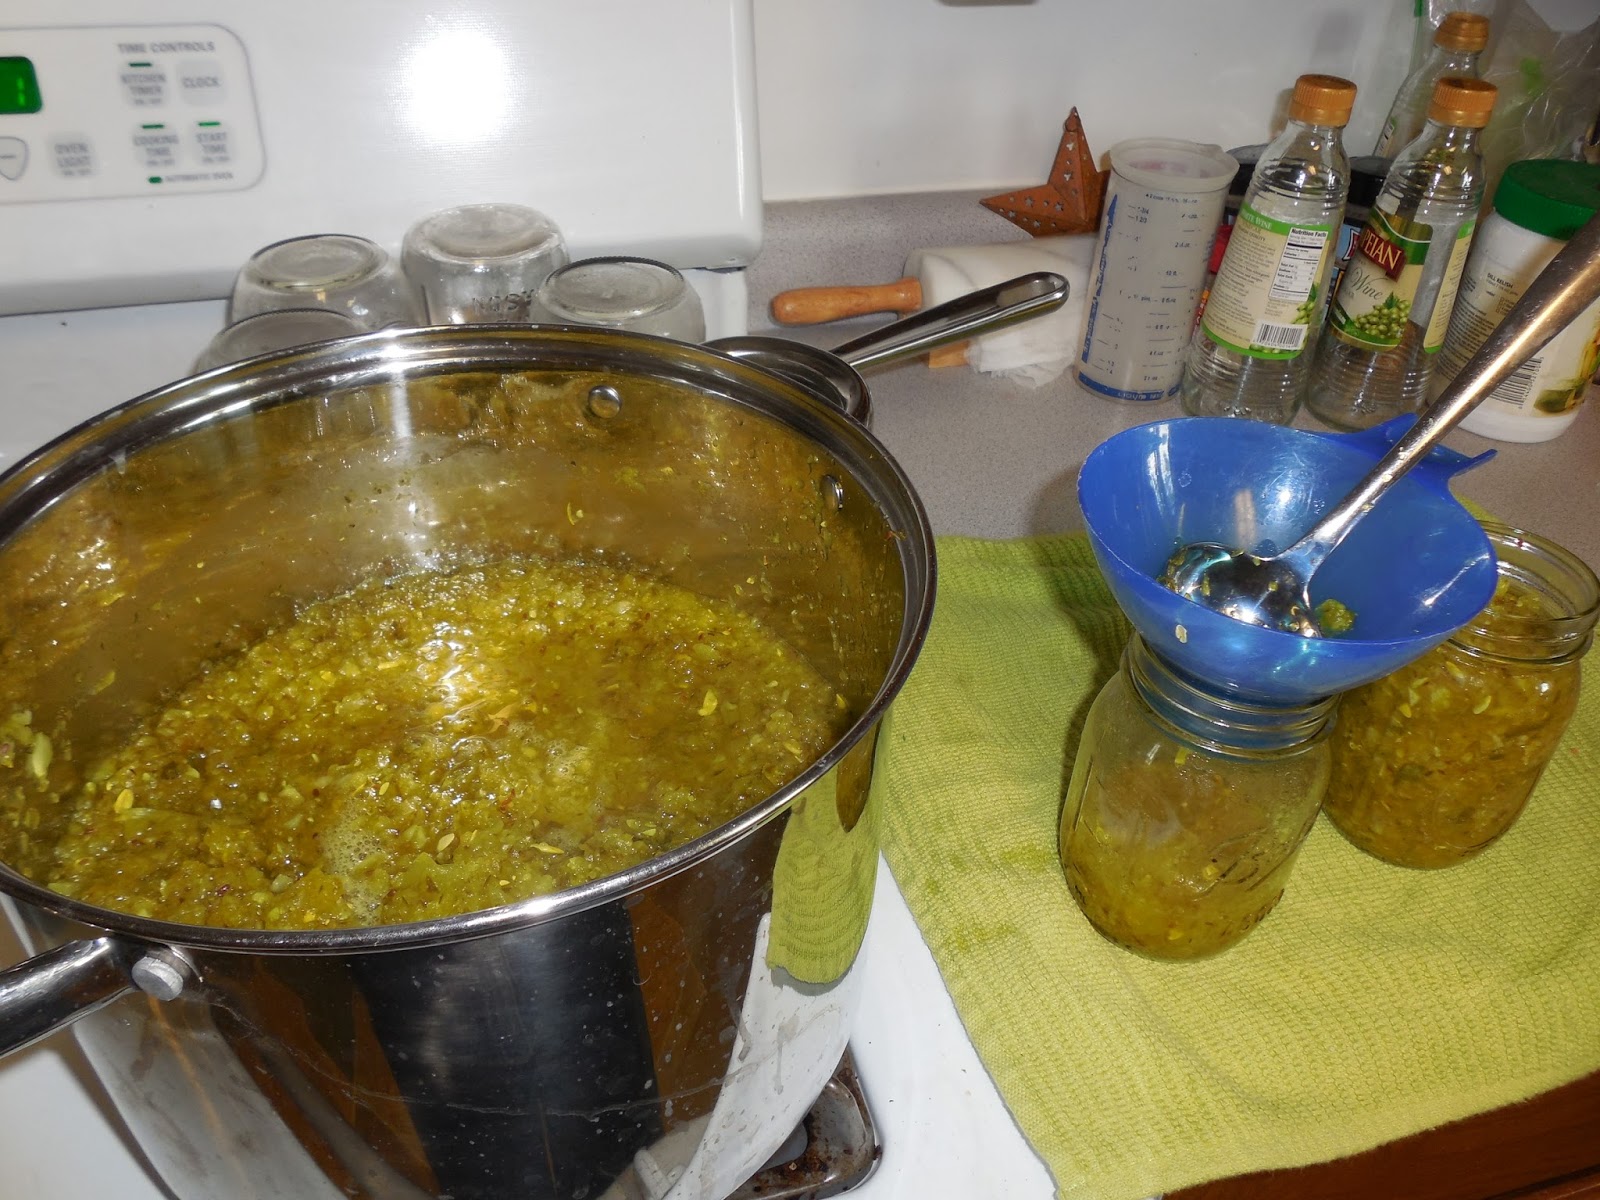
      Bring to a boil and simmer (per recipe). Ladle into jars.
       
  5. Finish well: This means clean up your workspace before you sit down.  Put the kitchen back in order, relocate any jars that need it, put away supplies and spices. Don't forget the dishes. I'd much rather return to tidy kitchen after resting than be haunted by ghost of batches past.
  6. Track inventory: Make your list of what you need for the family for the year. Cukes will keep going and going... and you may end up with pickles to last for years if you don't keep track. When you have plenty on your shelf -- start giving 'em away, or call friends to bring you ingredients and jars if you really love making batches for them. One of the best parts of all this gardening/canning business is gifting others with the bounty God has blessed you with ~ what a joy!
What a relief to have that all done at once! There's actually a shelf in that fridge -- who knew?!

Friday, September 6, 2013

Workable Workstations

It can be a big step to decide to undertake canning/preserving the season's goodness. When I went from college degree to stay at home mom, I found myself needing a productive project. Taking care of babies is a blessing and a calling, keeping house serves a purpose for the family's health and happiness...but let's be real, here. It is all a little frustrating...like hamster on the wheel frustrating. You mop, muddy feet enter. You cook, they eat and leave in a blink and are back for a snack just as fast. You feed and dress baby, he spits up AND loads the fresh diaper. Just slightly frustrating.

I needed something I could mark and quantify [accounting geek]. I needed to feel like something stayed accomplished for more than an hour or two. I gardened because it saved money -- I preserved for the same reason. I can admit it...I get warm fuzzies when I see my pantry shelves and freezer full of goodies to last through much of the year.

Yet it didn't happen overnight. I did not grow up this way.  My parents both worked and the biggest garden I saw was my aunts' gardens on spaghetti sauce day. Some people say it's amazing I do this with four kids...I say I would go crazy if I didn't have something like this to do as a SAHM. Even when working though, I loved having the joy of putting up the harvest and having good food to feed my family all year!

Canning and preserving is intimidating for some, but it becomes a lot easier as you get your feet and know what you are doing, what you need, and where you want everything. So today's lesson is the workable kitchen. You have to figure out what is going to work for you in your kitchen.  If you try it and something bugs you about the process, make a tweak to it next time until you get it where you want it.  It will make starting up each time easier if you do it consistently.  Make your own system.

Here is an example of how I setup to make the most of my space and be as efficient as I can. For me it is like a pivoting dance, all within a 10 sq. foot area in my L-shaped kitchen:

Setup your workstations:
  • Sink (washing/garbage catching) -- scrap bucket at the ready for chickens.  I keep a towel next to the sink for the washed product to reduce the water everywhere problem. This is where I wash my jars up if they are not fresh from the dishwasher, too. Right side soapy water, left side working area.
  • Island (workspace, scale, chopping block) -- I keep all of my needed tools, measuring cups, canning supplies in the island drawers so they are handy. Cutting boards, etc. below the countertop. Measure, chop, cut, where you have space. It helps to have back-up jars close to the stove too, if you can (if you don't have counter-space, a box of jars can live on the floor until cleaning/using). If you don't have an island, another solution would be the kitchen table -- basically you want a clear workspace so you don't have to shuffle things around constantly.
  • Processor (and holding bowls) - this is where you make it ready for the recipe. Note caffeine available when needed ;) I have to say an actual food processor has simplified my canning tremendously -- if you are serious about doing this, put that on your wish list. The first few years I cut everything by hand and it worked but took FOREVER!
  • Packing -- A towel helps contain any mess on the counters. OCD me uses dark towels for staining foods (tomatoes, beets, etc.) My salt, spices, and jar lids are all in the cupboard above my workspace here.  My vinegar is in the corner lazy-susan to my right. My magnetic lid-wand is usually found stuck to the range hood and the jar holders hanging on a cabinet knob (far left of photo). EVERYTHING handy -- you need to move fast during this phase to keep from letting things cool or get contaminated.
  • Canner/Stove - this is the four-burner plan, kids -- the reason our kitchens top 100 degrees all through August! Lids, jars, cooking, canner. You will also want a timer handy. Don't wander far from the stove for safety reasons.
  • Cooling - after processing, your jars need to cool at least 1" apart.  Best if they sit for 24 hours before moving, checking seals, and wiping down for storage.  If you don't have enough space, I understand. I eventually carefully (keep level and do not shake) move them after I hear the pop of the dome lids to the island a few feet away.
  • Cleaning - Wash as you go -- don't let the dishes kill you at the end of the day.  Clean as you go -- FlyLady would agree, friends! As soon as your last batch is ready to go, make space and start washing!  I find most of my canning dishes are too big for the dishwasher anyway, so if I don't do them right away, they just pile up!
  • Storage - store your jars of goodies in a cool, dark place if you can. I keep my jars in the boxes to limit light and store on our pantry shelves in the basement. I recommend stacking only two boxes high per shelf, only stacking if weight is evenly distributed on the bottom layer -- otherwise you may damage the jars below. Heavy duty shelving is a must -- if you've lifted those dozens of full jars you'll catch my drift! 

A few other tips -- just a few things that I found make this endeavor a lot smoother:
  • Keep the kids busy: this is a great time for outside play, movies, or hanging out with the other parent.
  • Buddy up: If you and a friend work together -- you can keep moving even when something is missing and needs fetched, or kids need wrangled.  This also helps to cut back the labor-intensity -- everything is better with a friend!
  • Beat the heat: It is a sad inevitability when you are processing food for preservation -- the kitchen is getting hotter all day. Go to another room to enjoy a fan or AC in-between steps. Run outside and take a quick dip in the pool. Wear a bandana at your hairline to keep the sweat out of your face. Have a cold, wet bandana around your neck. Don't stray far for long, but a few minutes of relief makes a world of difference.
  • Keep meals simple: Have a lunch you can just pull out and serve, or a dinner in the crockpot. This way, you are not splitting your attention between your preserving efforts and making a meal for the family. Even better -- if you have an older child that is capable, put them on lunch duty. Anytime the kids can help with household stuff is a double bonus -- you save time and they learn to be part of the team!
  • Tune in: Get some music going. I tell you the truth, nothing lifts my spirit like an afternoon serving my family, being productive, and listening to the local contemporary worship station. How can you get down and tired with uplifting music going? You're dancing through the kitchen and the time goes quickly!
  • Remember what's really important: Here's the big one, friends: all this work and busyness means nothing if we are doing it for our own glory. Yes, that little voice inside me says "I did this!" With good motivation, but still that is my nasty little pride talking. I did not do this. God did this through me. Just like He provides my husband's income to buy our groceries and pay our house payment...He provides the sun and the rain and the harvest for my canning efforts. He provides me the energy (and the resources like caffeine and vitamin B to boost that). He provides occupied children so I can get it all done. He provides good friends and family to motivate, encourage, and teach me. Mine are just the hands he uses to provide for my family - the glory is His.

See? A little organization and perspective can go a long way to dispel the myth that canning is too intimidating. With a plan and a song and a joyful heart -- you CAN...well, can anything!